Cherry Studio Setup Guide
Connect Gety to Cherry Studio so the AI can answer directly from your local files.
I. Enable MCP in Gety
-
Open Gety -> Settings -> AI Integration, Select MCP.
-
In the pop-up, enter a name you’ll remember (e.g., CherryStudio), Create.
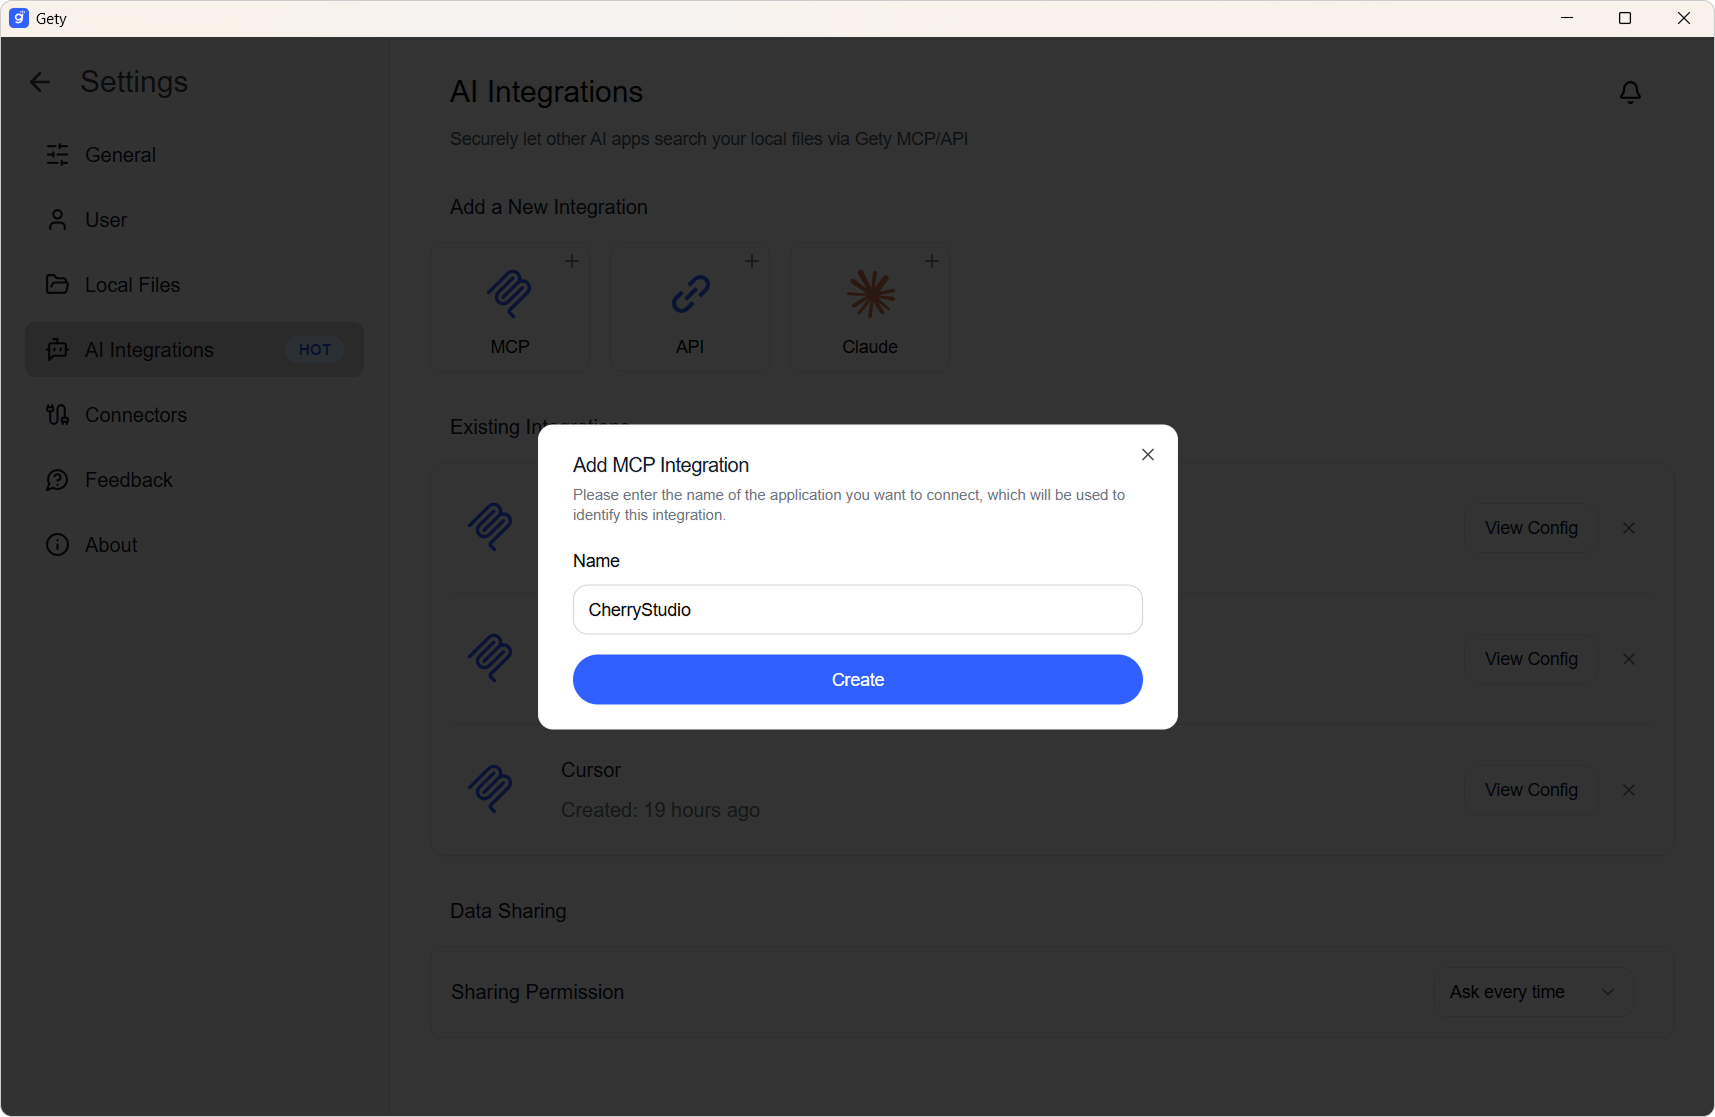
- Create the MCP integration and copy the JSON configuration for later use.

II. Add Gety in Cherry Studio
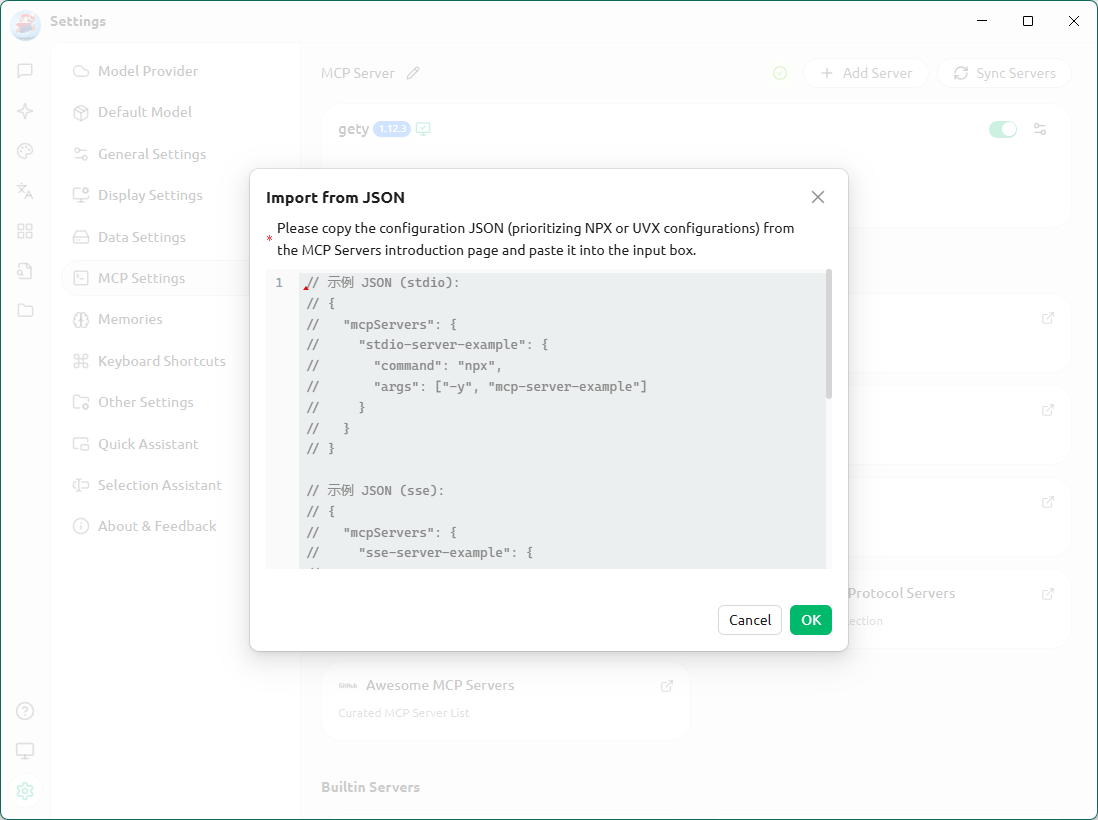
- Go to Settings -> MCP Settings, click Add Server, choose Import from JSON, paste the config from Gety, and save.
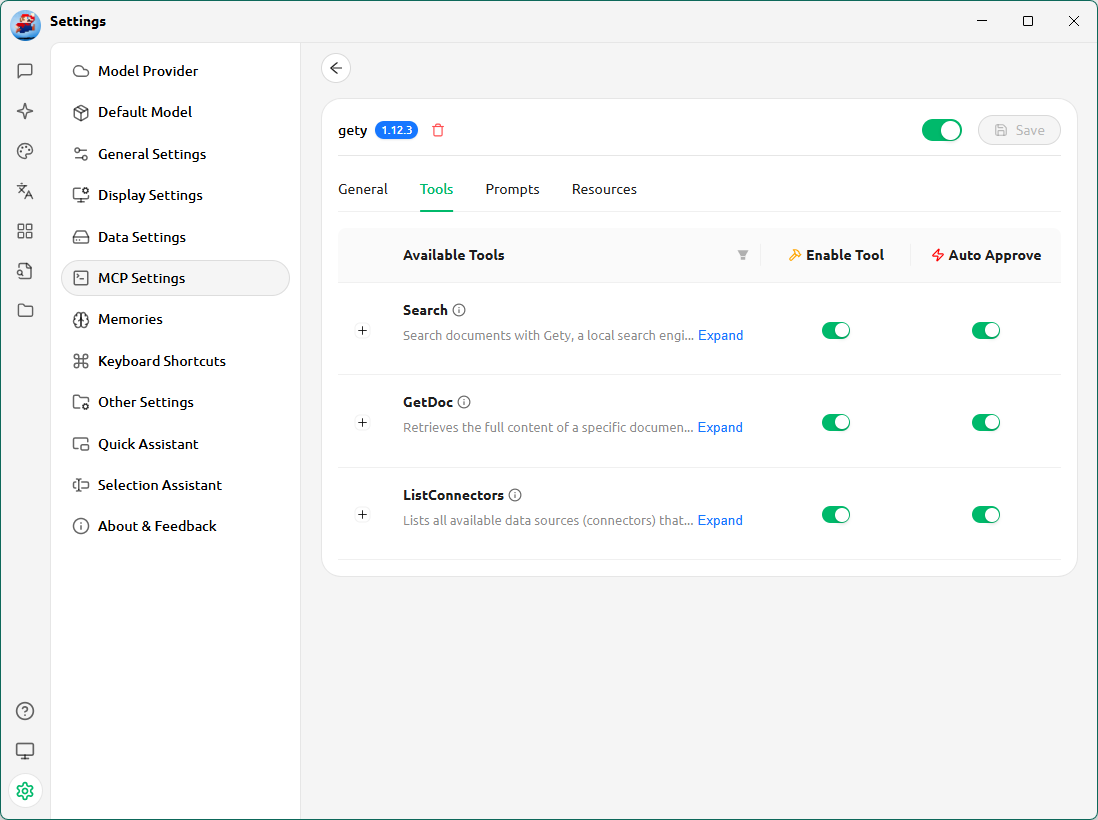
- To confirm it’s connected, check the Gety MCP server card under Tools — you should see three tools listed.
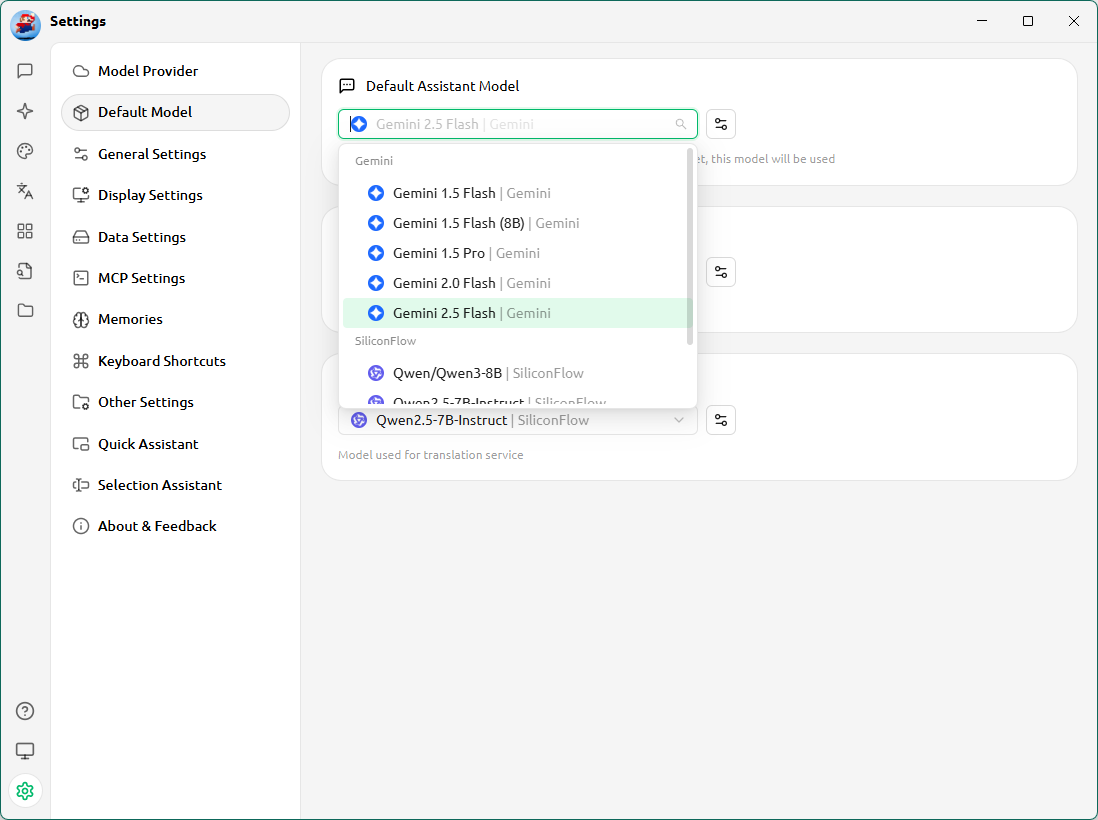
III. Add an API Key (skip if already configured)
- In Model Provider, select your AI service provider. Paste your API key and click Check. If valid and your connection is stable, you’ll see a green checkmark.
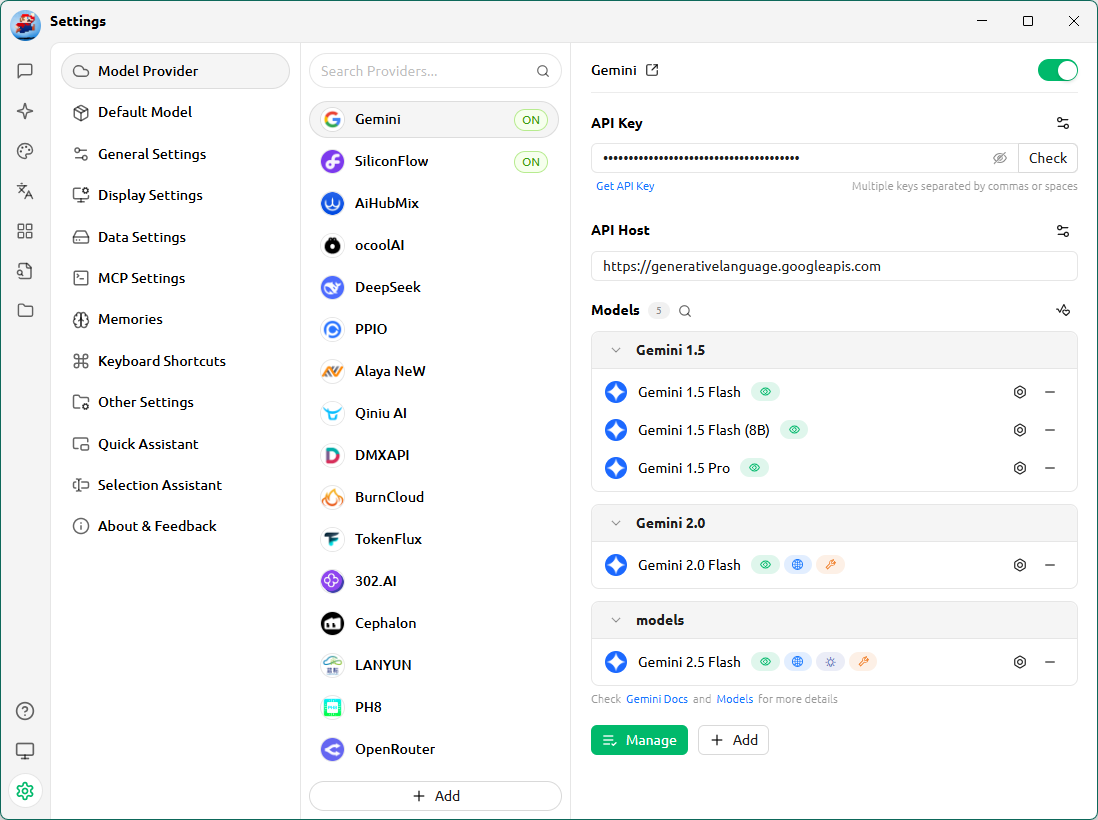
- Under Default Model, choose the provider and model you want — and you’re done.
IV. Start using it
-
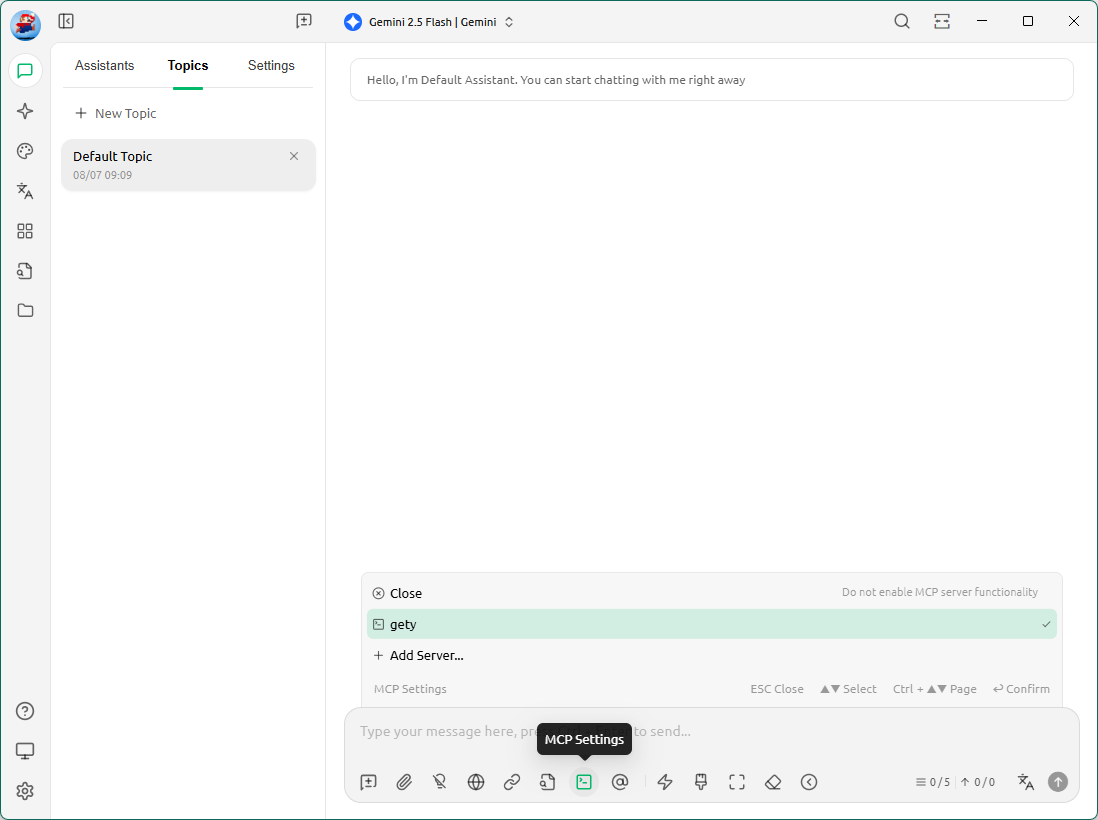
Before you begin, make sure Gety is running in the background, otherwise it won’t work properly.
-
In Cherry Studio, click the MCP icon below the chat input box and select Gety. You can now start chatting with the AI.
-
The AI can now directly reference your local files when answering.
Example:
“Find the clauses about payment milestones in my service contract and quote the original text.”
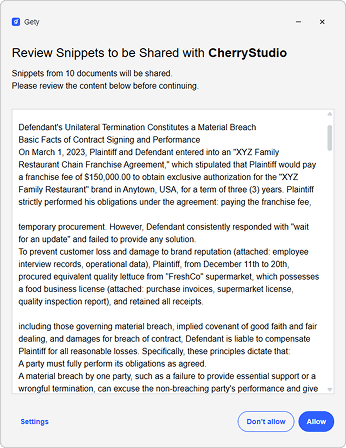
AI Integration gives you the benefits of AI powered by your own files — always under your control. Every time content is shared, whether it’s a short snippet or a longer section, a confirmation pop-up lets you review it first.
V. Usage Tips
When using AI calls, please keep the following in mind:
-
Make sure Gety is running in the background, otherwise it won’t work properly.
-
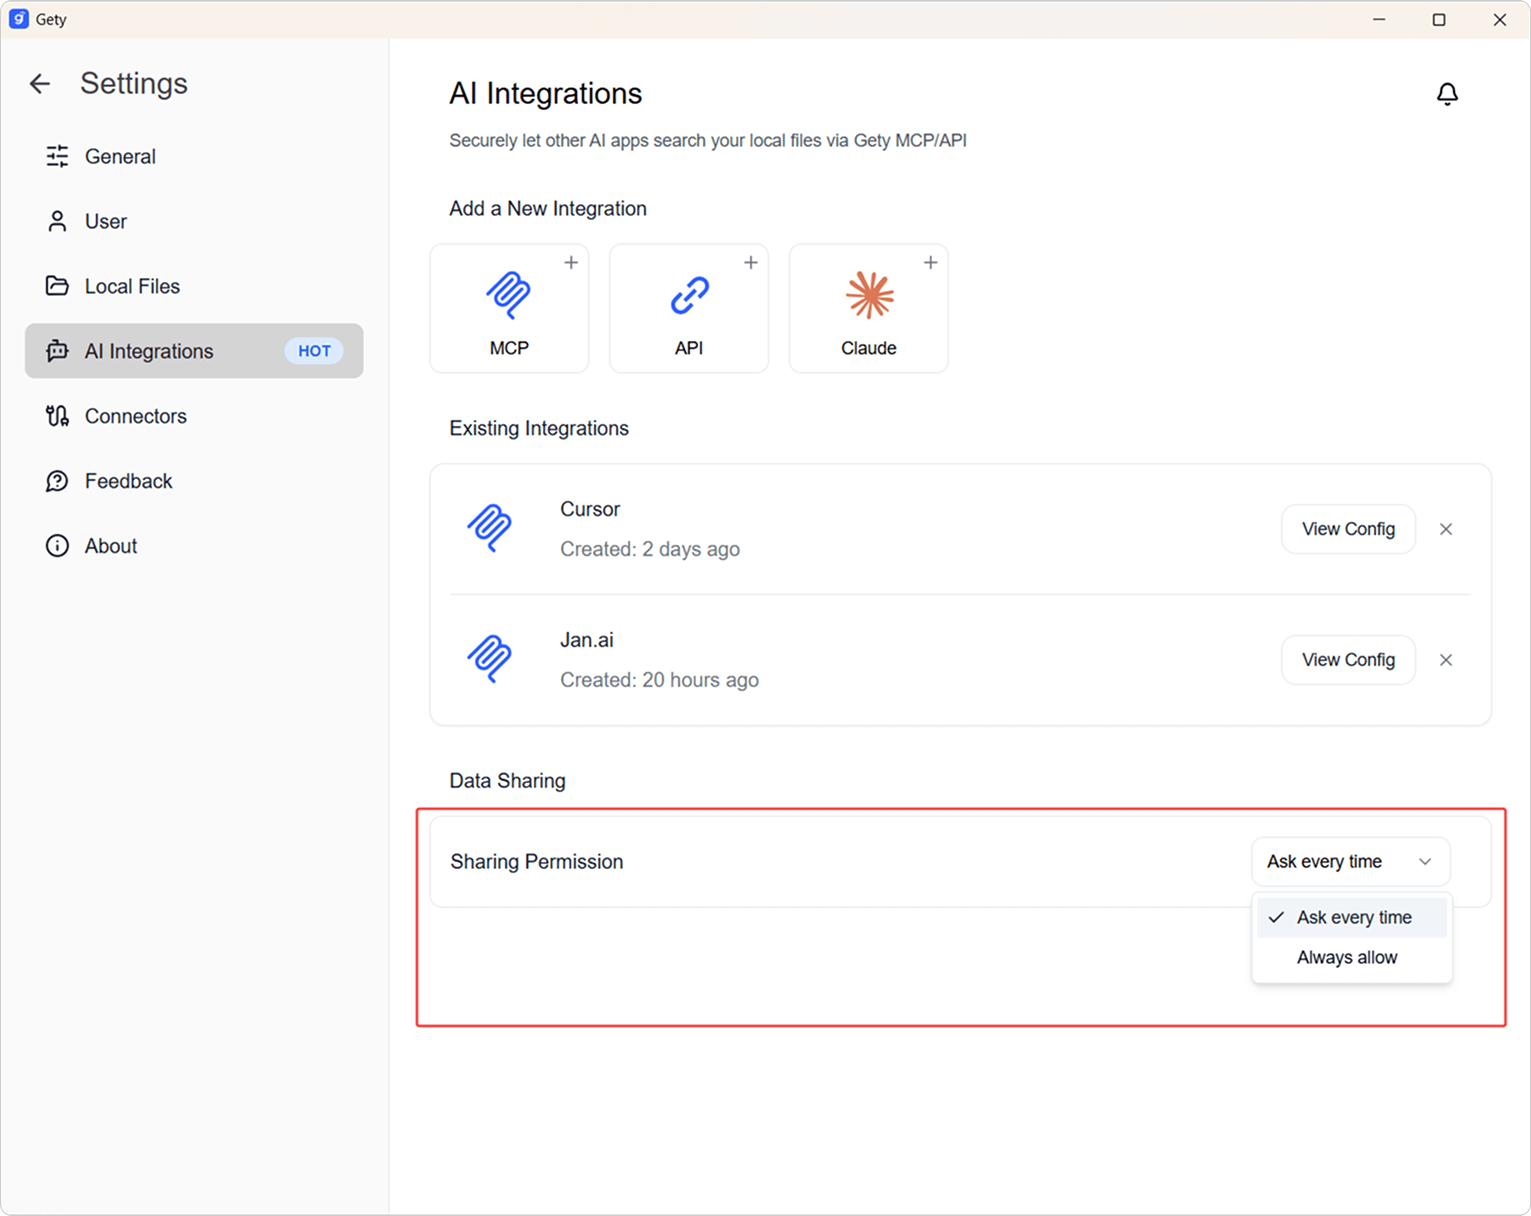
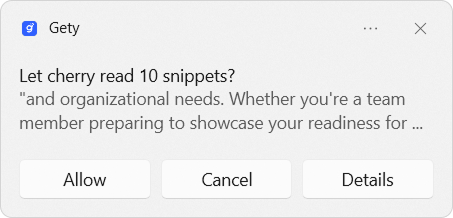
Gety will follow your Data Sharing Settings to decide whether to show a confirmation window:
-
Always Ask: A small window will pop up in the bottom right on every call. Click Details to review the local file snippet that will be sent to the AI, so you can ensure no sensitive content is included.
-
Always Allow: Skips the confirmation step and sends the snippet directly to the AI for a smoother workflow.
-
-
For the best search and answer quality, Let Gety finish indexing (including the semantic index) first.
-
We recommend using larger-parameter models to get deeper and more accurate answers.s