Quick Start
Get up and running with Gety in three steps: install, search, and connect your AI tools.
1. Install
Download Gety from gety.ai/download. Before installing, check the system requirements for Windows, macOS, and Linux.
All data stays on your computer — Gety runs 100% locally and never sends your files anywhere.
On first launch, Gety automatically indexes your entire disk — reading the full content of every document, PDF, spreadsheet, and even text inside images. You don't need to worry about where your files are stored — whether they're in project folders, on your Desktop, or buried in Downloads, Gety finds them all.
You can start searching right away while the index is still building. Results will become more complete as indexing finishes.
2. Search your files
Indexing takes just a few minutes, and after that every search returns in milliseconds. Open Gety and type in the search box — results update with every keystroke, no need to press Enter.
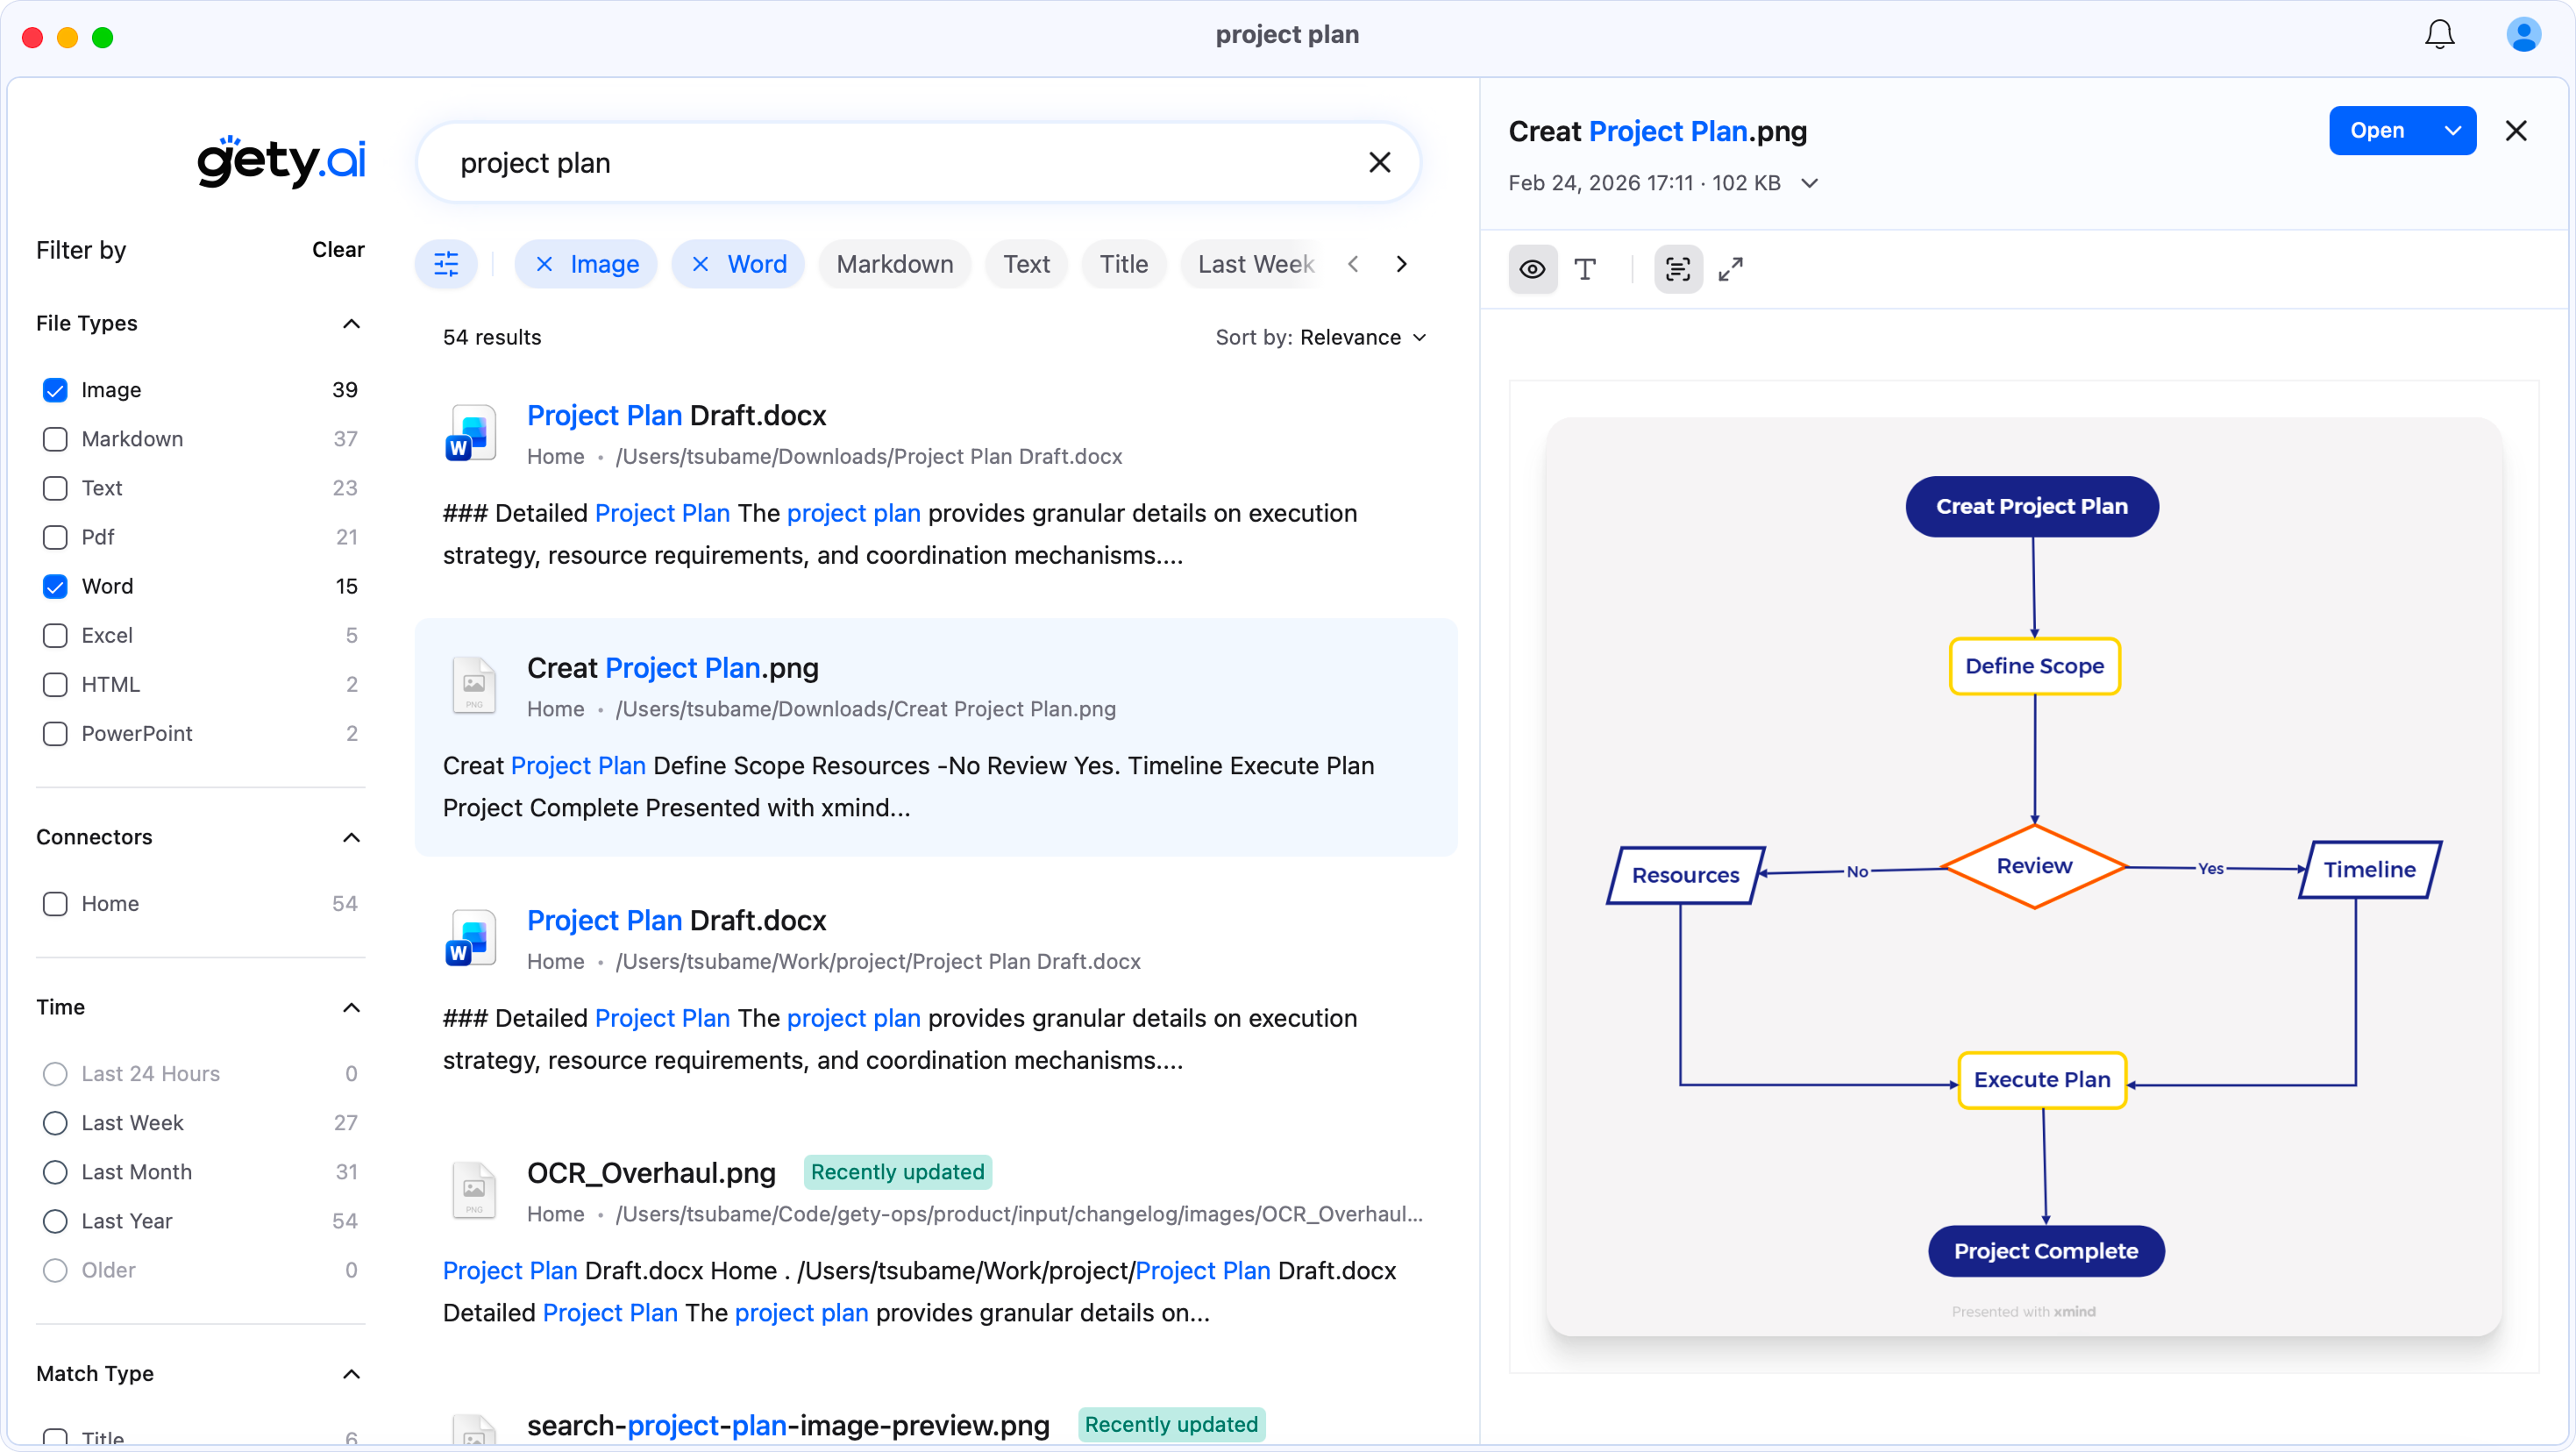
- Preview and highlight — Click any result and the preview panel highlights matching passages, taking you straight to the information you need.
- Filter and refine — Use the capsule quick filters below the search box or the left filter panel to narrow results by file type or time range.
- Semantic search — Can't remember the keyword? Just describe what you're looking for and Gety matches by meaning.
- OCR — Text inside images and scanned documents can be searched too.
For more details, see File Search.
3. Work with AI
Connect your AI tools to Gety, and they can search all your local files automatically — no uploads, no copy-pasting.
AI agents like Claude Cowork and Claude Code can go further: search your scattered files through Gety, pull the details they need, and deliver finished presentations, reports, and briefings.
See Work with AI for setup guides.
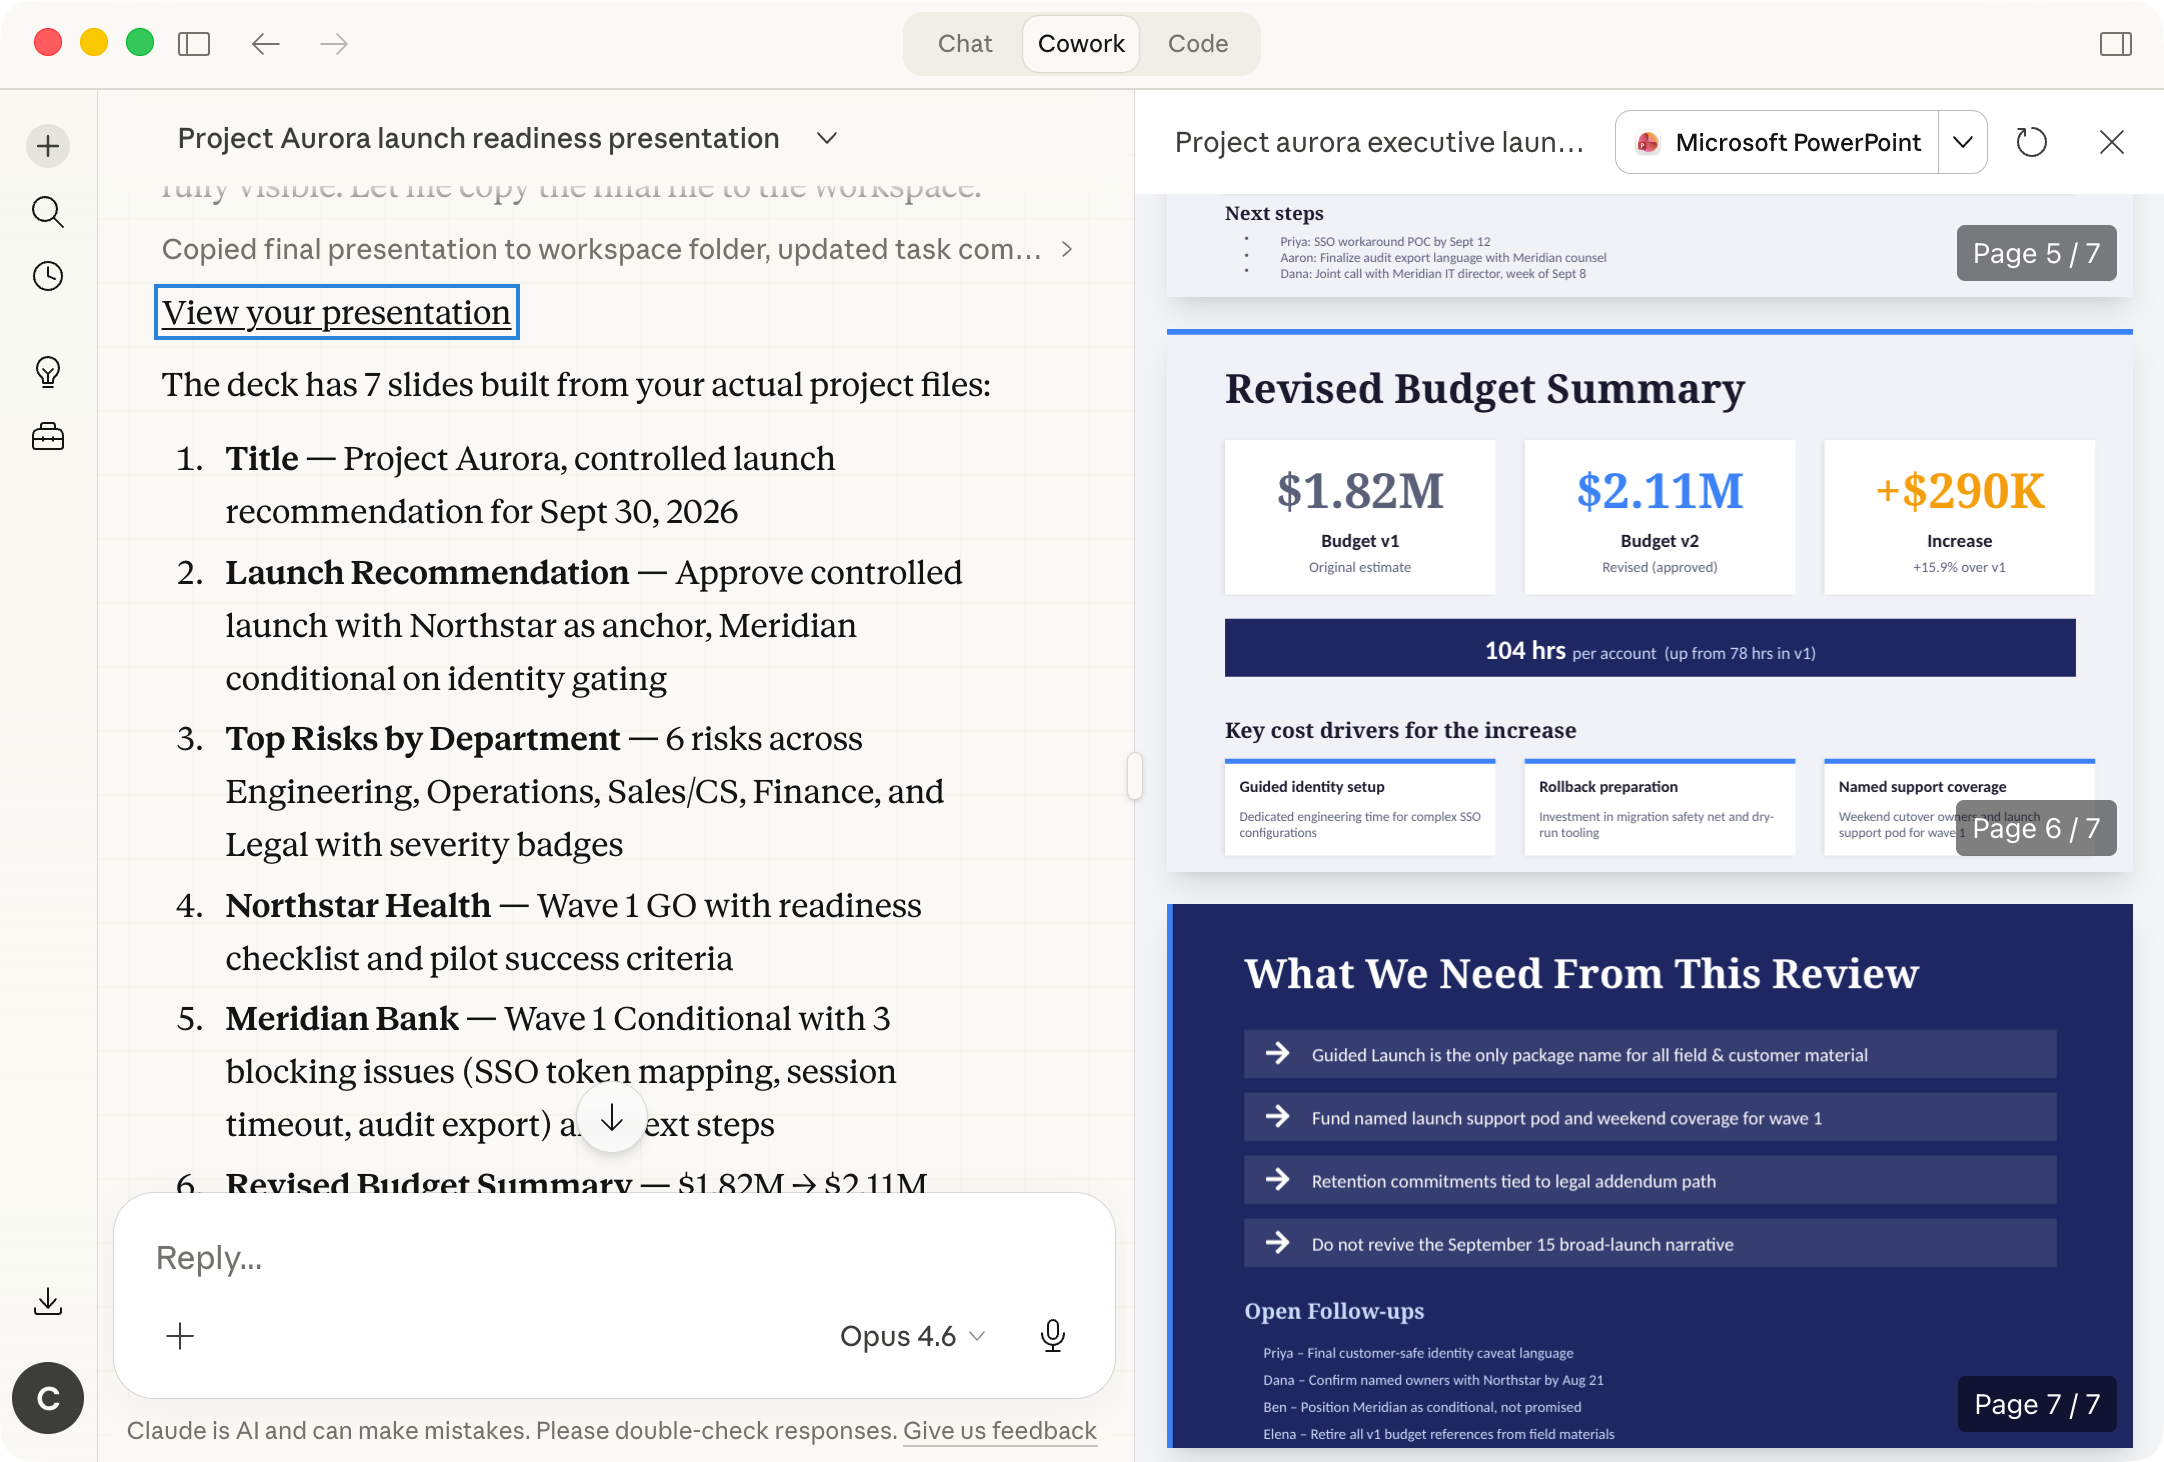 Claude Cowork + Gety: a 7-slide presentation built from files scattered across your computer