Gety LAN Access Tutorial
When enabled, other devices on your local network can access Gety search via API and MCP. API key authentication is still required. Only enable on trusted networks.
Use Cases
Any device on the same local network can access Gety's search service, for example:
- Let an agent deployed on one machine (e.g. OpenClaw) search files on another machine
- Windows searching files on a Mac
- One device connected to multiple devices for unified search
This tutorial uses Windows accessing Gety on macOS as an example. The setup logic is identical for all other device combinations.
Before you start
- Install and run Gety on the device whose files you want to search
- Make sure Gety has indexed at least one folder
- Connect both devices to the same trusted local network
Via API
The API approach is more flexible and suited for developers or users who want direct control over requests.
Step 1: Enable LAN Access and Create an API Integration
On Mac (the device being searched), open Gety and go to Settings -> AI Integrations -> Network Access:
- Enable the Allow LAN Access toggle
- Under Add Integration, select API, enter a name (e.g.
My-macOS-API), and click Create - Click View Config next to the newly created integration. Under Network Interface, select the active LAN address of the Mac instead of localhost, then copy the full API documentation
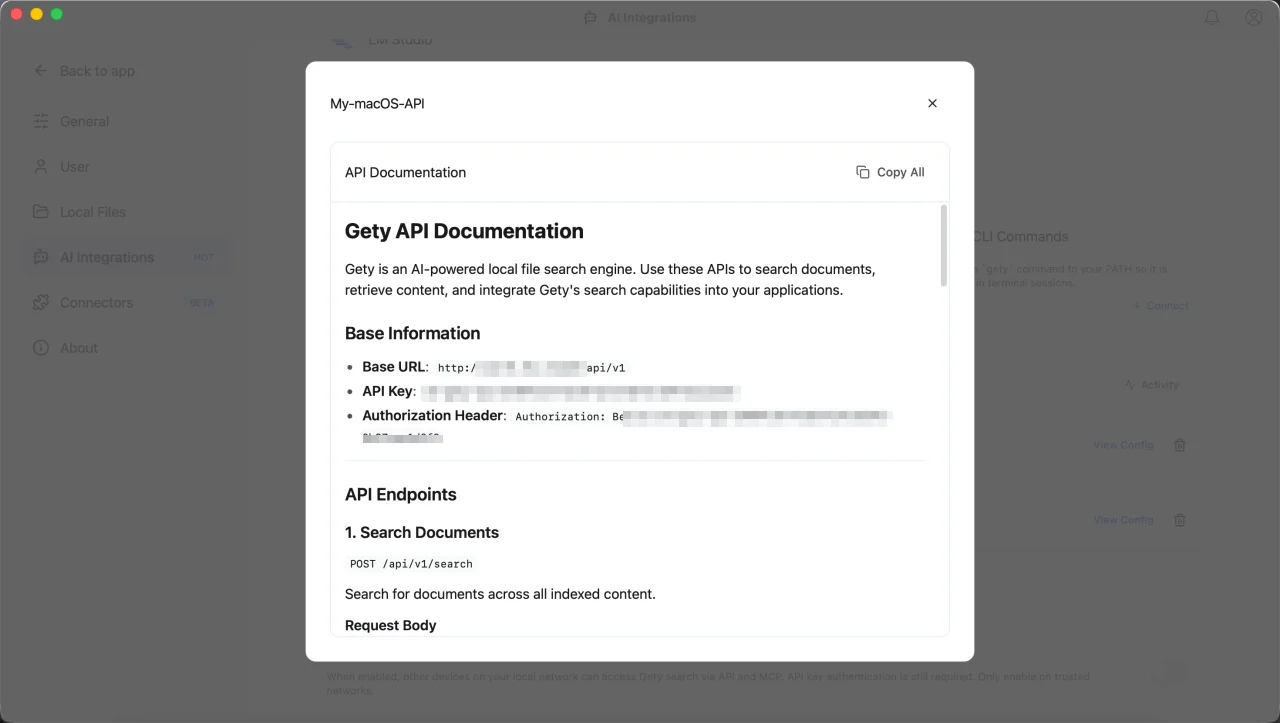
Step 2: Send the API Docs to the Other Device and Hand Them to AI
Copy the API documentation to the searching device, open an AI agent (e.g. OpenClaw, Claude Code, Codex), paste the full API documentation, and say:
This is a remote Gety search API. Use it whenever I ask you to search for files.
Step 3: Search
Just say "Search for xxx" in the agent.
You can also call the API directly via curl in the terminal. See the API documentation for available parameters.
Via MCP
MCP lets AI tools integrate more deeply with Gety — no need to pass configuration manually each time. The AI will call Gety automatically when needed.
Step 1: Create an MCP Integration
On Mac (the device being searched), open Gety and go to Settings -> AI Integrations -> Add Integration. Select MCP, choose HTTP Server (http), enter a name (e.g. My-macOS-MCP), and click Create.
Once created, click View Config. Under Network Interface, select the active LAN address of the Mac instead of localhost, then copy the JSON configuration.
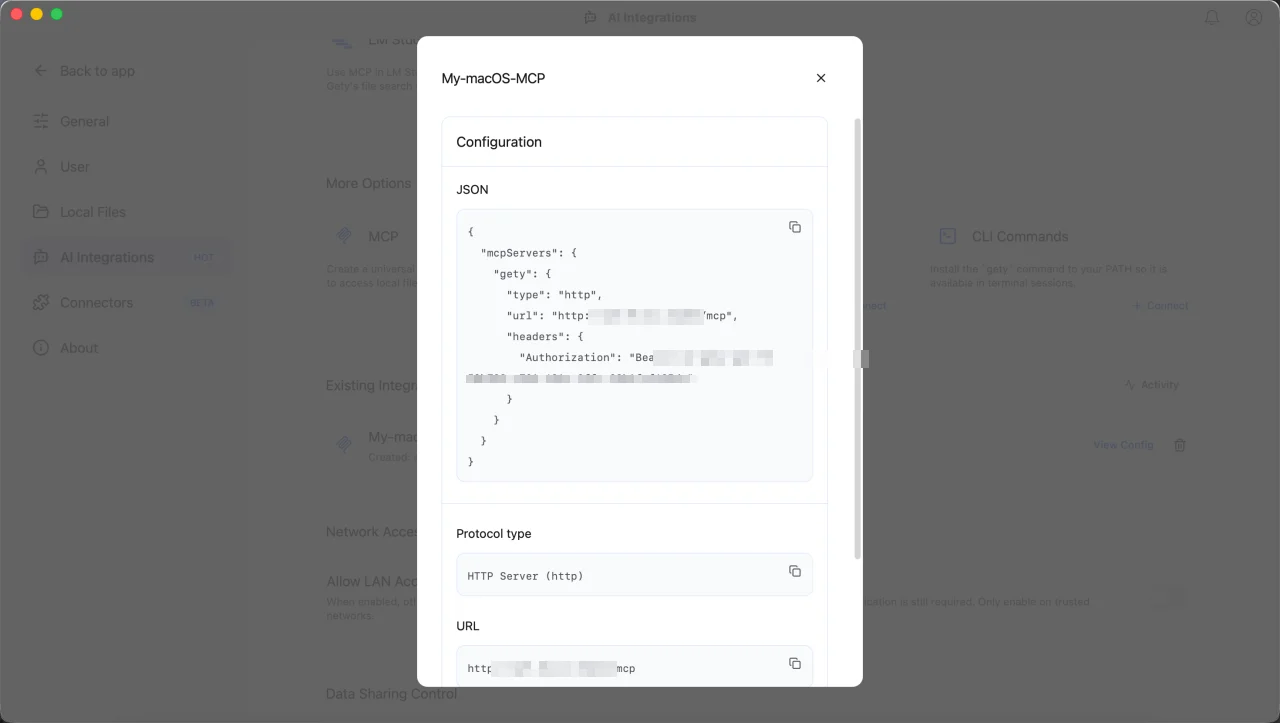
Step 2: Send the Configuration
Send the copied JSON configuration to the user on the other device. If the copied address still shows localhost or 0.0.0.0, return to View Config, select the active LAN address under Network Interface, and copy it again.
Step 3: Add MCP to Your AI Tool
On Windows (the searching device), open a terminal AI (e.g. Claude Code), paste the received JSON configuration, and say:
"This is the Gety MCP config. Please add it to Claude Code."
The AI will run the configuration command automatically.
Step 4: Search with Gety
Once added, just say "Use Gety to search for xxx" in the conversation, and the AI will call Gety to search files on the other device.
The same MCP integration can be used across multiple AI tools — Cherry Studio, Cursor, and more — without creating it again. Check View Config for setup instructions for each tool. Note: Claude Desktop does not currently support HTTP-type MCP directly and requires additional configuration.
FAQ
Q: No response at all — the request just hangs?
First check for notification issues: if the Mac has Do Not Disturb enabled, Gety's access request notifications will be blocked, causing requests to hang indefinitely.
Solution: Disable Do Not Disturb, open Notification Center, find the access request from Gety, click Allow, then retry.
If notifications aren't the issue, check the following:
- If the device running Gety is Windows, Windows Firewall may block inbound TCP traffic on port 31226. On that Gety device, open PowerShell as Administrator and run:
netsh advfirewall firewall add rule name="Gety" dir=in action=allow protocol=TCP localport=31226
- The two devices are not on the same network → Confirm both IPs are on the same subnet (e.g. both
192.168.x.x)
Q: Which network address should I use?
In the Network Interface selector in View Config, choose the IPv4 address for the active Wi-Fi or Ethernet connection. Do not choose localhost (127.0.0.1) or an address from a virtual network adapter.
Security Notes
- Use this feature only on trusted networks such as home or office Wi-Fi — avoid enabling it on public Wi-Fi
- Your API key is an access credential — do not share it with others
- When not in use, disable Allow LAN Access in Settings to reduce exposure